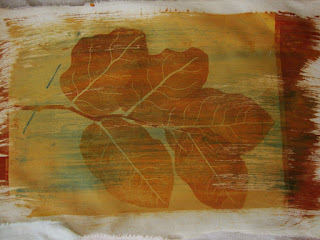
Saturday, April 30, 2016

Basic Immersion Dye Instructions For Procion Dye Powders


IMMERSION DYEING INSTRUCTIONS FOR USING PROCION DYES (POWDERS)

© Kay Koeper Sorensen 2016

You will need:

Fabric: Prewashed PFD cotton fabric

                PFD fabric does not have any finishes (or fabric softeners, etc.) that will prevent dye from bonding with the fabric – yet it is still advisable to wash it before dying to open the fibers to more readily bond with the dye

Water – Body temperature

Dye powder – Procion MX

Salt – Salt helps to drive the dye molecules out of the dye water and into the fabric

Soda Ash – Soda ash is necessary for the chemical reaction to occur which allows the dye to bond to the fabric

I am going to give you the basic directions for doing a full immersion dye bath as used by both Carol Soderlund and Jan Myers-Newbury.

I am basing this on using measurements of materials, rather than weight.

Jan’s method uses measurements, Carol uses weights.

This is not the only way to use Procion dyes, but it is the most common and generally gives the best results.

It can be used with pole wrapped fabric, clamped fabric, stitched fabric, tied fabric or loose fabric.

I will be using only one dye color for this example.

I am basing this on using a 5 gallon bucket so you have room for the fabric to move around).

LET’S DO IT

1.       Put two gallons of warm water in your bucket

2.       Add 2 cups of salt and stir until it is dissolved

3.       Mix 2-3 Tablespoons of dye powder in a small amount of water in a jar with a tight lid to dissolve the dye. Shake vigorously to dissolve dye. If using black dye double the amount of dye powder you use.

Be sure you wear a mask for this step.

4.    Add the dissolved dye to the bucket and stir.

5.    Add the fabric to the bucket.

                WET vs DRY fabric – if you want some of your fabric to remain white (when doing shibori dyeing) start with WET fabric…easy to remember Wet/White   WATER is a resist

If you want fabric to have little or no white start with dry fabric.

      6.      Stir as soon as you add your fabric to the bucket making sure all fabric is submerged.

      7.      After the first 15 minutes add 1/3 cup of soda ash that has already been dissolved in 2 cup of HOT water. Do not pour the soda ash solution directly on the fabric or you might have some splotching.

      8.      Fabric will remain in dye bath for ONE hour. You will stir vigorously every 15 minutes, more often if desired. This rearranges the fabric so dye reaches all the fabric.

     9.       After one hour thoroughly rinse your fabric in COLD water. I usually rinse in a bucket and change the water about 3 times. This removes the soda ash and prevents back staining.

 10.         It is now time to wash out your dyed fabric with hot water and1 teaspoon Blue Dawn. This is best done in your washing machine with the hottest water available…140 degrees is the normal recommendation. I can set my washer for 205 degrees so I always use that for the washout.

 11.         When done washing either dry in dryer or hang to dry. Iron to see your beautiful fabric.

This is meant to be a very BASIC instruction file.

Of course you can do smaller batches and adjust amounts accordingly.

Others may do things differently, or use different amounts of the ingredients.

I have edited these instructions from the previous file I sent and suggested you print.

4 Types Of Shibori


Shibori– 4 types

I am not using technical (Japanese) names for these, just my descriptive names.

There are other variations and types but these are 4 I will define.

1.       Pole wrap

                Many ways to wrap

                (Rope or other poles)

2.       Clamp resist

                Various objects

3.       Stitched

                Hand

                Machine

4.       Tie dye or folds
 Various ways to tie

  Common tshirt      Grateful dead look


Within each category there are many ways to wrap, clamp, stitch or tie.

There are also various types of dyes and even paints that can be used.

Add to that many ways to color and/or layer and you could spend a lifetime doing shibori and never repeat.

Saturday, April 23, 2016

Shibori Pole Dyeing - Supply List

On May 2 this activity will be our last hurrah for the season before Beth and Kay head north.
I thought it would be a good idea to add the supply list to our blog where it won't get lost.


SUPPLY LIST FOR OUR SHIBORI POLE DYEING ON MAY 2, 2016

We will be doing some simple pole dyeing and manipulate  the fabric 3 different ways.

This will be an introduction to shibori and something that we can cover in our usual time.
_________________________________________________________________________

SUPPLIES TO BRING FOR SHIBORI POLE DYEING

Rubber gloves—the longer kitchen type, not the disposables

Wear old clothes as chances are you’ll get dye on them

1 yard WHITE PFD 100% cotton – wash and dry it before you come

DO NOT SODA SOAK IT   DO NOT IRON IT

If you don’t have any PFD cotton you can buy regular white Kona cotton from Joannes

½ yard nylon net… the cheap stuff…not nylon tulle

Scissors

A bucket or plastic tote you can bring your partially rinsed fabric home in …. You will bring it home covered in a small amount of water so if you have a lid that is the safest way

Lunch

I will have the poles, dyes, rubber bands, chemicals, and all the other things we need

If I forgot anything I’ll send another message but this is an easy one to pack up for.

Tuesday, April 19, 2016

Beth's Experimenting With Pastels and Inktense Blocks


First up is a chlorine resist...".I couldn't get the detail from the stencil so I ended up with black fabric and orange blobs. Saturday I then used fabric paint thin with fabric medium and was able to get more precise detail. Then Sunday I used my metallic paint sticks and was able to get the detail that you see here. "


"T- inks on prewashed white muslin again I had too much moisture so there was running. I heat set it and then used metallic paint sticks to get the detail."


"Prewashed white muslin with black ink again too much moisture A lot of running heat set and then I went over it with oil paint sticks metallic  and I love it !"


These are two pieces Beth worked on last Friday at our play date!


"I felt it was too dark to work with my Inktense pencils so I chose to use oil sticks I love it. It is commercial fabric."


"This is a piece I originally  worked on in Oscoda, Michiga.  it is oil sticks with veined stencils. Nancy lent me the next stencil to go over the existing leaves I fused. The transparency really makes the piece look better."


Monday, April 18, 2016

Inktense Experiments

As I mentioned at Beth's house I have found a lot of information about Inktense Pencils/Blocks on the internet.
One of the best IMHO about how to use them, with what and the durability is:
http://lindasteelequilts.blogspot.com/2012/08/playing-with-inktense-pencils.html


I did put a fabric medium (Liquitex)  over the white base cloth I did with stencils Friday. I believe it is slightly lighter (hard to tell as photos differ depending on the light). At this point it is very stiff. I will iron it and do a gentle washout and see what happens.

The black piece I was so disappointed in is even more of a disappointment. I used the same fabric medium and it made the marks much lighter. After it dried I wet it and did more color on it over texture items. I am not at all in love with it. Nancy, it is not nearly as lovely as the piece you gave me. It is drying now but I don't think that is going to make any difference.

I am guessing my original thoughts were right and since these are inks/dyes you can't cover black or dark colors not matter what you do with Inktense??? Prove me wrong!

Sunday, April 17, 2016

April showers of Inktense blocks and paint stiks!

Beth hosted our April play date!  First up, Bonnie shared pictures of her play date (without us, as she is back in Michigan!).  But she did have wine and cookies!  We only had cookies baked by Beth but they were really, really good so guess we didn't miss the wine (much!).

This set Bonnie created was cotton velvet, poly satin and some other poly fabric w/texture and plain cotton w/a mask of painter's tape.
And these are poly fabric Bonnie stamped using some of the same technique(s) above.


I used oil pastels to add another layer on previous dyed/stamped pieces. 

The Ginkgo leaves were a stencil that I placed oil pastel along the edge of the stencil then rubbed on the outside of the stencil and then pushed the pastel onto the fabric.


The 2nd piece, I used a cardboard leaf and, same technique as above, just rubbing oil pastel along the outside edge of the leaf, then rubbed the edge onto the fabric.


Not great results here.  I used Inktense blocks rubbing over a leaf plate. I did dampen the fabric the rubbed the block over the plate.   But it's a good start for more layering of another technique!


Free for all in March!

Nancy hosted our March play day of stamping, painting, whatever technique we wanted.  It was a good time for us to layer some of our  'ugly' fabrics!


Some of Robbie's hand dyes that were stamped and mono printed


A 'Solar Fast' mistake (letting it sit in sun without rinsing) created a background for stamping


Let's do some hand stitching in February!

Beth hosted our February play date.  Shibori is a method of resist dyeing that includes stitching, clamping and binding techniques. We decided to try our hand at stitching fabric vs folding or clamping!  And what great results we each had! 


Some of Beth's work

This piece was overdyed with black

Beth pleated a piece of silk

Nancy produced this piece and is working on several others!  We think she is hooked on Shibori!


Robbie's shibori


Sun Printing in January!

Our next technique was sun printing, hosted by Kay!  We had some great results using SetaColor paints, Cyano print fabric and Solar Fast.

Our fabrics 'sunning' themselves!  These were all painted with SetaColor.


Cyano prints by Beth!


Next up was playing with Solar Fast.


And now that piece is being hand stitched!
  Another one in the works!


Parfait Ice Dyeing At Nancy's

Our first activity was the parfait ice dyeing that Nancy shared with us in her airy "studio" space.
These are pictures of some of the pieces I created.


I used the second piece from the left in the lower photo to create this quilt.
I really loved this technique and the result it produced. On top of that it was so easy.